
Clear Stamps for Scrapbooking can turn a plain page into a detailed memory scene. A small flower, date, or handwritten-style phrase can guide the entire layout. These transparent stamps let crafters see the photograph beneath the design. That visibility makes placement easier, especially near faces, borders, and handwritten notes. Still, clear placement does not guarantee a perfect impression. Uneven pressure, dry ink, or a dusty acrylic block can leave broken lines. Small mistakes happen.
Tim Holtz, a widely recognized craft designer, once said, “Creativity is allowing yourself to make mistakes. Art is knowing which ones to keep.” That idea fits stamping well. A slightly faded leaf may look natural on a garden page. A crooked title may need restamping, though. This guide explains how to choose ink, attach stamps, prepare paper, and apply steady pressure. It also explores layering, color coordination, cleaning, and safe storage. Readers will see why a stamp position should be tested on scrap paper first. A simple pencil guide can protect important photographs from accidental marks. Too much ink remains a common problem. Less can be better.
The process rewards patience more than expensive supplies. Clear stamps can create polished results, but they still require practice. Beginners may press too hard or lift the block unevenly. I have found that slowing down often improves consistency. Yet personal preference matters, and not every “perfect” image suits a handmade page. The best results usually balance control with character.
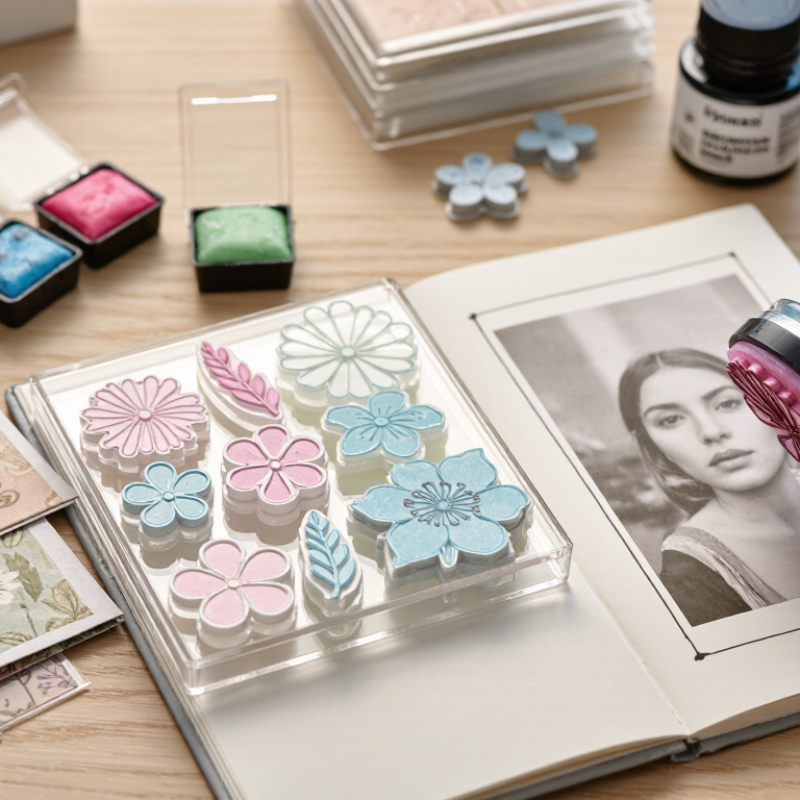
Choosing clear stamps well makes scrapbooking cleaner, faster, and more personal. In my own scrapbook sessions, I check the polymer first. A flexible stamp should cling evenly to an acrylic block without curling at the edges. Fine lines need firm support. I also prefer sets with practical phrases, leaves, borders, and small frames. Oversized designs can dominate a page, while tiny stamps often disappear beside photographs. Grand View Research estimated the global scrapbooking market at about USD 1.8 billion in 2023, with continued growth expected through 2030. That expansion reflects demand for hands-on, customized memory keeping.
Essential supplies should match the stamp’s purpose. Choose an acrylic block with grid lines for accurate placement. Add archival, acid-free ink when stamping near photographs. A stamp positioner helps repeat images, although I still misalign mine sometimes. Smooth cardstock prevents broken outlines, while textured paper creates softer, less predictable impressions. Keep a damp, lint-free cloth nearby. Clean stamps immediately, especially after using dark pigment ink. Store them flat in transparent sleeves, away from heat and dust.
The Association for Creative Industries has repeatedly identified paper crafts as a major participation category in its industry reporting. That supports investing in reusable tools rather than disposable decorations. Start with a small coordinated set. Test each image on scrap paper first. I once trusted a beautiful sample sheet and ignored the paper grain. The final impression looked uneven. That mistake still influences how I choose supplies. Test before committing.
Before using clear stamps, prepare a clean, flat workspace with enough light. I keep a craft mat, acrylic block, archival ink, scrap paper, ruler, pencil, and soft wipes nearby. Clear stamps show exactly where the image will land, but only when the block stays steady. Test each impression on scrap paper first. This reveals uneven ink, damaged edges, or a design that feels too dark.
Plan the scrapbook page before stamping. Place photographs, paper layers, and embellishments loosely on the page. Leave breathing room around important images. I often use removable paper shapes to mark possible stamp positions. A simple visual triangle can guide the eye from the title to the photos and journaling. Keep repeated images at different heights, but avoid scattering them without purpose. The layout should support the story, not compete with it.
Press the stamp straight down and lift it vertically. Do not rock the block. That small movement can blur fine lines. Use less ink than expected, especially on detailed designs. Let the impression dry before adding another layer. I once stamped a border too close to the photograph, and the page looked cramped. Moving the photo solved part of the problem, though the spacing still felt imperfect. That mistake reminded me to check balance from a distance. Step back often. A ruler helps, but your eyes catch awkward rhythm faster. Keep a test impression beside the page while adjusting the final arrangement.
Clear stamps make scrapbook layouts easy to personalize. Their transparent surface helps you position images accurately. Even ink coverage begins with a clean, dry stamp. I place the stamp on a smooth acrylic block before inking. A firm, flat block prevents uneven pressure. Pressing too hard can push ink into tiny gaps. This mistake often creates blurry edges.
Choose ink that matches your paper and drying needs. Before stamping, tap the ink pad gently across the stamp. Use light, repeated taps instead of one heavy press. Check the stamp from an angle under bright light. The raised design should look evenly coated. Rotate the block slightly if pale areas remain. If ink pools around the edges, remove some with a clean tissue. Do not rush.
Lower one edge onto the paper, then slowly roll the block down. Keep the block steady and apply gentle, even pressure. Hold it briefly without rocking the stamp. Lift straight upward. The image should look crisp and balanced. I still occasionally miss a corner, especially on textured paper. That result reminds me to inspect the surface first. Smooth cardstock usually gives more reliable detail. Practice paper is useful. Test the stamp once before placing it on the finished page.
Transferring stamped images onto scrapbook paper starts with surface control. Choose smooth, acid-free paper with enough weight to resist warping. A 2024 Association for Creative Industries report describes creative activities as reaching more than half of U.S. households, showing how widely paper-based hobbies are practiced. That participation does not guarantee perfect results. Clean technique still matters.
Place the clear stamp on an acrylic block, then ink the raised surface evenly. Test the image on scrap paper before touching the layout. Press straight down for three seconds. Lift the block vertically. Do not twist it. For detailed designs, a pigment ink usually gives sharper coverage, while dye ink dries faster. However, drying time changes with humidity and paper absorbency. Leave the image untouched for several minutes.
Use a ruler to mark the paper lightly before stamping. It helps repeated images stay aligned. The ISO 9706 standard identifies permanence requirements for long-lasting paper, so selecting paper made for archival use supports safer scrapbook storage. I sometimes stamp too close to the edge, especially when working quickly. That mistake is useful. It reveals spacing problems before the final page. If the image looks pale, restamp only after aligning the block with the first impression. A small guide mark underneath can improve accuracy, though it may remain visible if placed carelessly.
Clear stamps make scrapbooking more flexible because you can build images in controlled layers. I usually plan the background before opening the ink pad. A pale first layer creates depth without overpowering photographs. Let it dry. Then add darker details, such as leaves, borders, or small lettering. Use a transparent block and light pressure for sharper impressions. Testing on scrap paper prevents unwanted marks on the page.
Layering works best when each image has a clear role. I often stamp large shapes first and place fine patterns afterward. Slightly shifting the second layer can create a handmade effect, but poor alignment may look accidental. My first attempts were often uneven. That taught me to use guide marks and leave breathing space around important photos. Clear stamps also decorate journaling cards, tags, and paper pockets without adding much bulk. Small mistakes matter.
Preserving the finished page requires suitable materials and careful handling. Choose acid-free, lignin-free paper and archival-quality ink when possible. These choices help reduce fading and paper deterioration over time. Allow every stamped area to dry fully before stacking pages or adding adhesive elements. Keep the album away from direct sunlight, humidity, and strong temperature changes. Clean stamps after use with a soft, slightly damp cloth, then store them flat and dust-free. I still inspect older pages each year. Ink can behave differently as seasons change, so preservation is an ongoing habit rather than a single step.
Dust and moisture can create pale spots or blurred edges. Wipe the stamp gently, then let it dry completely.
Tap the ink pad lightly across the raised design. Use repeated taps instead of one heavy press. Check the surface under bright light.
Remove the extra ink with a clean tissue. Too much ink can spread into small gaps and soften the image.
Lower one edge first, then roll the block down slowly. Hold it briefly. Lift straight upward without twisting.
Smooth, acid-free cardstock usually produces clearer details. Heavier paper also resists warping. Textured paper may leave missing corners.
Yes. Stamp once on scrap paper first. This reveals weak coverage, spacing problems, or unexpected drying time.
Pigment ink often gives sharper coverage on detailed designs. Dye ink usually dries faster. Humidity and paper absorbency can change both results.
Mark the paper lightly with a ruler. Keep the guide mark underneath the stamp. I sometimes stamp too close to the edge, so spacing deserves another check.
Align the block carefully with the original impression, then restamp. Do not guess. A small shift can create a doubled outline.
Leave it untouched for several minutes. Drying depends on the ink, paper, and room humidity. Rushing can smear the image with one careless touch.
Clear Stamps for Scrapbooking offer a simple and flexible way to add personality, texture, and storytelling details to handmade pages. Begin by choosing stamps that match your theme, then gather essential supplies such as archival ink, acrylic blocks, scrapbook paper, paper trimmers, adhesive, and decorative embellishments. Before stamping, prepare a clean, well-lit workspace and sketch a basic page layout so photos, journaling, and stamped designs work together naturally.
For even ink coverage, gently press the stamp onto the ink pad without rocking it, checking that the raised image is fully coated. Position the stamp carefully over the scrapbook paper and apply steady, even pressure before lifting it straight up. Allow the image to dry, then build interest by layering stamped patterns, borders, cutouts, handwritten notes, or small decorations. Finally, protect the completed page by using acid-free materials, avoiding excess moisture, and storing the scrapbook in a cool, dry place. With thoughtful planning and careful application, clear stamps can create polished, memorable pages.